Luxor · Luxor Governorate, Egypt
Luxor — The Workmen and the King
An audio walk on Luxor's West Bank, from the village of the royal tomb builders at Deir el Medina down the road to the fortress temple of Ramesses III at Medinet Habu.
Narration in English · Stop 1 is free
 Tour no. 41
- Stops
- 11
- Distance
- 2.4 km (1.5 mi)
- Time
- About 100 minutes
- Route
- Moderate walking route
Listen before you buy
Stop 1 · The Workmen's Village
Stop 1 is free. Listen before you buy.
The walk
An audio tour from the village of the royal tomb builders at Deir el Medina down the road to Ramesses III's temple at Medinet Habu, at your own pace
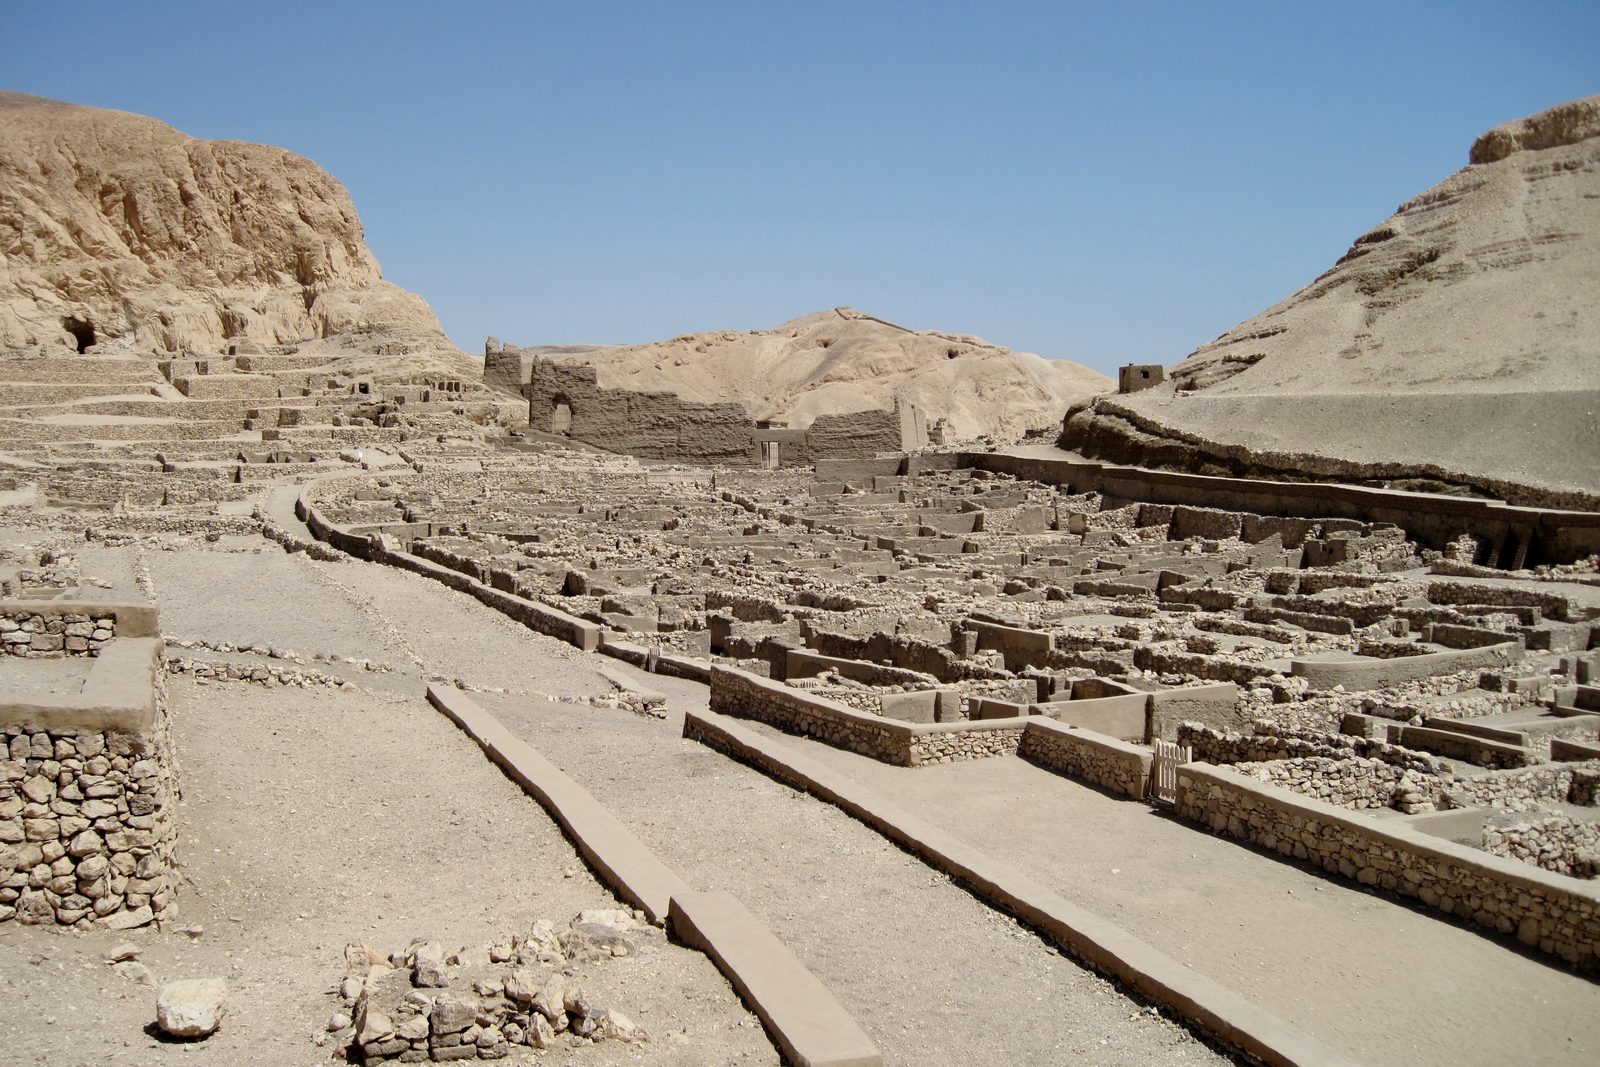
The men who cut and painted the royal tombs of the New Kingdom lived with their families in a walled village in a dry valley on the west bank, the Place of Truth, now called Deir el Medina. Because so many of them could write, their own notes survive in thousands: an attendance list from the fortieth year of Ramesses II that excuses one absence as drinking with Khonsu, a rival's charges against the chief workman Paneb, and the will in which Naunakhte cut three of her eight children out of her property. The walk starts in their village, passes the cemetery where the burial chamber of Sennedjem's family was found untouched in 1886, and stops by the Ptolemaic temple of Hathor, whose monastery gave the place its Arabic name, and the Great Pit, where Bernard Bruyère's team found around five thousand ostraca.
From there the walk follows the road down past the hill of Qurnet Murai. In the twenty ninth year of Ramesses III the workmen of the village, whose grain had not come, downed tools and walked to the temples at the edge of the fields, as the scribe of the tomb, Amennakht, recorded. The walk passes the ruined temple of Ay and Horemheb and the hills where the houses of the village of al Qurna began to be demolished in December 2006, and ends at Medinet Habu, Ramesses III's walled temple, inside whose walls the scribes of the royal tombs came to live: the High Gate, which one scholar linked to the plot of one of his wives, Tiye, the battle reliefs that the University of Chicago's Epigraphic Survey has copied line by line since 1924, the palace window, and the second court, where a Christian town, Djeme, later built its church.
Route notes
The stops
About each stop · narration stays in the app
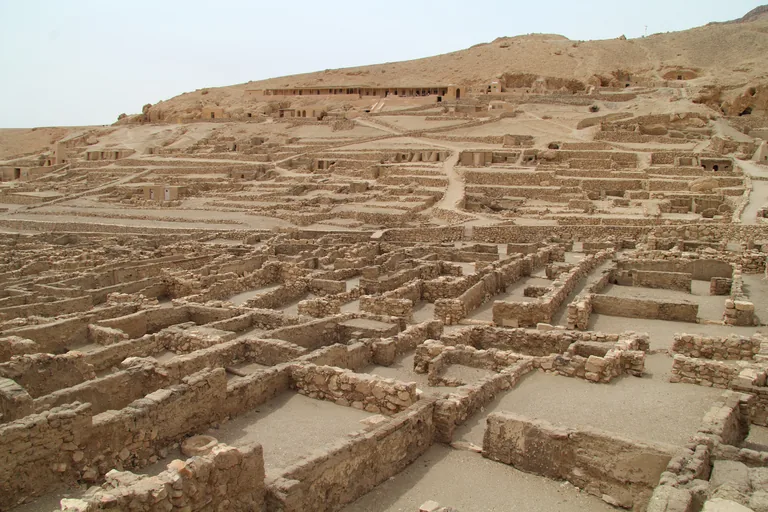
Photo: Djehouty · Wikimedia Commons source · CC BY-SA 4.0 · Cropped to the recorded 3:2 source rectangle and resized from the exact hash-bound source input. The Workmen's Village
Deir el Medina is the walled village in a narrow desert valley on the west bank where the craftsmen who cut and decorated the royal tombs of the New Kingdom lived with their families, under the supervision of the vizier. The walk begins here because the desert kept the village almost untouched for many years after it was abandoned: the French Institute of Oriental Archaeology has held the site since 1917, Bernard Bruyère divided its sixty eight houses into sectors named after the points of the compass, and Egyptian students of Egyptology and trainee restorers now take part in the work. The stop works from the paved area at the site entrance by the parking; the village itself is entered on uneven packed earth and stone, there is no shade, and Deir el Medina needs its own ticket.
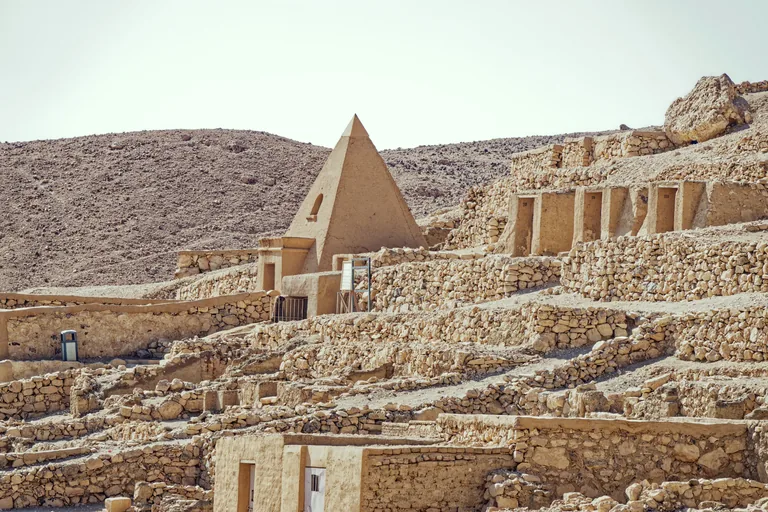
Photo: Holger Uwe Schmitt · Wikimedia Commons source · CC BY-SA 4.0 · Cropped to the recorded 3:2 source rectangle and resized from the exact hash-bound source input. The Workmen's Tombs
The workmen's cemetery climbs the hillside west of the village in terraces of tomb chapels, about sixty of them decorated, among them Sennedjem's tomb, TT1, whose chapel of mudbrick and stone, restored to about 6.85 metres high, was once crowned by a limestone pyramidion showing him adoring the sun god. The route stops here for the family behind it: Sennedjem and Iyneferti had at least ten known children, their eldest son Khabekhenet owned the nearby tomb, TT2, and in the burial chamber, whose painting was probably finished before the fifth year of Ramesses II, a family banquet on the south wall names his brothers, sons and daughters. Which tombs are open changes from season to season, so the stop is told from outside, at the top of a short flight of steps on the cemetery slope, where the ground around the chapels is uneven.
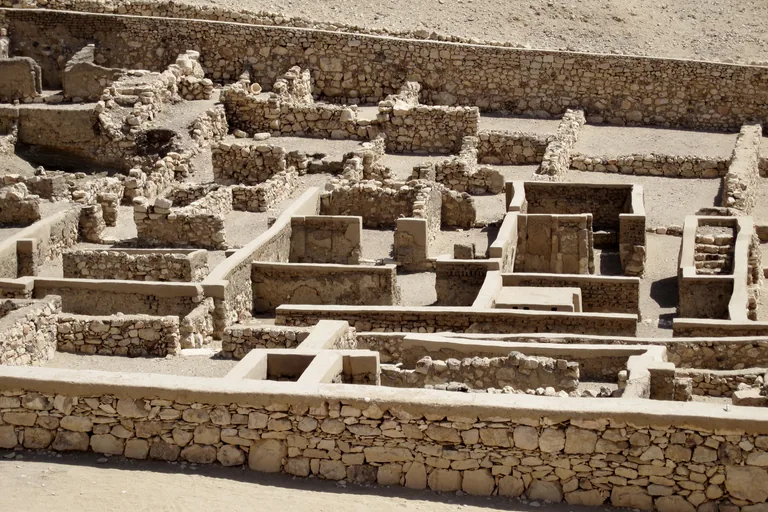
Photo: Olaf Tausch · Wikimedia Commons source · CC BY 3.0 · Cropped to the recorded 3:2 source rectangle and resized from the exact hash-bound source input. The Village Houses
The village houses are the stone footings and low walls seen over the west wall of Deir el Medina, rebuilt in the early Ramesside period, in particular under Seti I, when the houses were standardized to a certain degree, more or less following a pattern of three successive rooms. The route stops here for the people who can be named in them: Bernard Bruyère began matching the houses to their former inhabitants in the 1930s, after digging the central and southern sectors in 1934 and 1935, and two scholars have since set criteria for how secure each match is and asked whether families kept the same houses over decades. The path runs on packed earth along the outside of the west wall, and the houses are seen over the wall and are not entered by the walk.
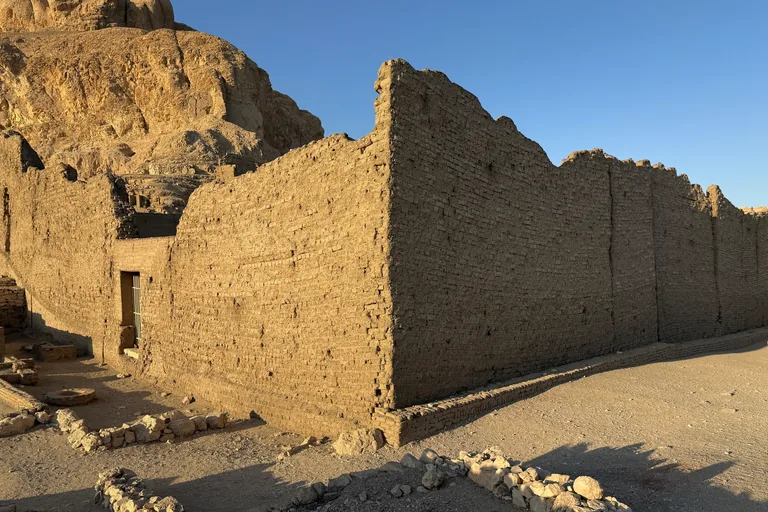
Photo: Chabe01 · Wikimedia Commons source · CC BY-SA 4.0 · Cropped to the recorded 3:2 source rectangle and resized from the exact hash-bound source input. Hathor Temple and the Great Pit
The Hathor temple is a small Ptolemaic sandstone sanctuary, about 15 by 9 metres, inside a mudbrick enclosure of about 50 by 50 metres that rises on three terraces north east of the village, with its main gate facing the Amun sanctuary of Ramesses II. The route stops here for the scholars of the place: Champollion read the temple as Ptolemaic and dedicated to Hathor, the Czech Egyptologist Jaroslav Černý joined Bruyère's excavations in 1925 and made the village his lifelong study, and a small dig in March 2017 in front of the enclosure showed that walls Bruyère had taken for a house are the front of a temple of Amun of Ramesses II. The stop is on a packed earth path outside the enclosure; the temple is not entered by the walk, and the Great Pit north of it is seen from a distance and is not approached.
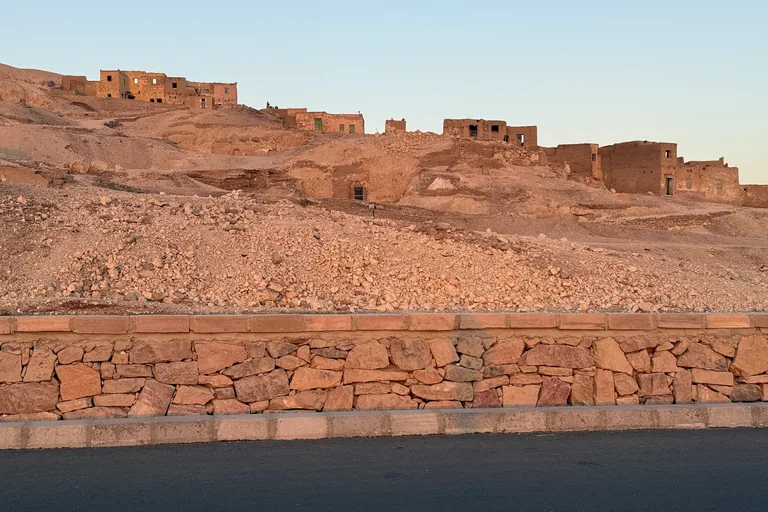
Photo: Chabe01 · Wikimedia Commons source · CC BY-SA 4.0 · Cropped to the recorded 3:2 source rectangle and resized from the exact hash-bound source input. Road Below Qurnet Murai
The road below Qurnet Murai runs down out of the workmen's valley beside a bare hill that is part of the Theban Necropolis, where a wall of the tomb chapel of Huy, viceroy of Kush at the end of the Eighteenth Dynasty, shows a Nubian delegation coming to Egypt. The route stops here for the strike told in a papyrus now in the Museo Egizio in Turin: the village had its own police, the medjay, the scribe of the tomb kept what is called the Necropolis Journal of village and worksite, and later in the year of the strike, when the crew sat at the rear of the temple of Merneptah, the mayor of Thebes sent 50 sacks of emmer to tide them over. The stand point is on a road used by cars and tour buses with no mapped pavement, so keep to the edge; there is no shade here or on the way down, so carry water.
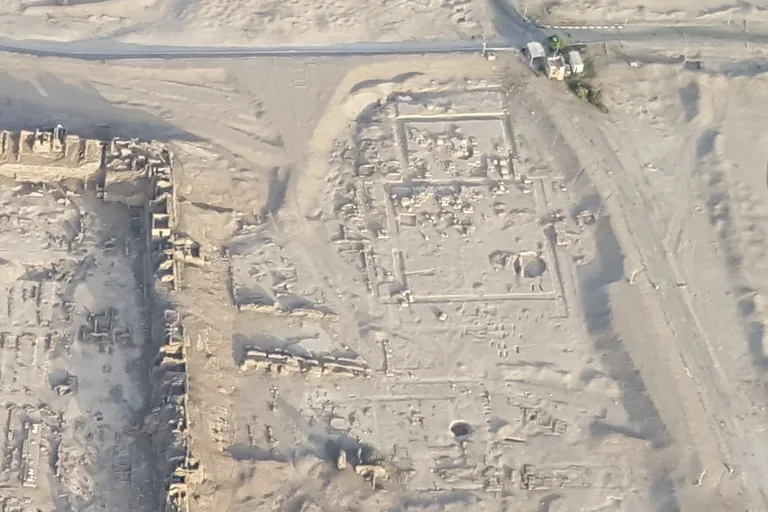
Photo: Ovedc · Wikimedia Commons source · CC BY-SA 4.0 · Cropped to the recorded 3:2 source rectangle and resized from the exact hash-bound source input. Temple of Ay and Horemheb
The temple of Ay and Horemheb is a mortuary temple, now almost completely destroyed, built on sloping ground with its rear eight metres higher than its front, in sandstone with mudbrick buildings around it: three courts with pylons, a peristyle court, hypostyle halls, the sanctuary and a small palace. The route stops here because the temple stood at the southern end of the line of New Kingdom royal mortuary temples, on the route of the Beautiful Festival of the Valley, and more than a century later Ramesses III built his own temple against its southern enclosure wall, at a time when Horemheb's cult was probably still kept there. The stand point is on a village road with traffic and no mapped pavement; the ruin is looked at from the road and is not presented as open to visitors.
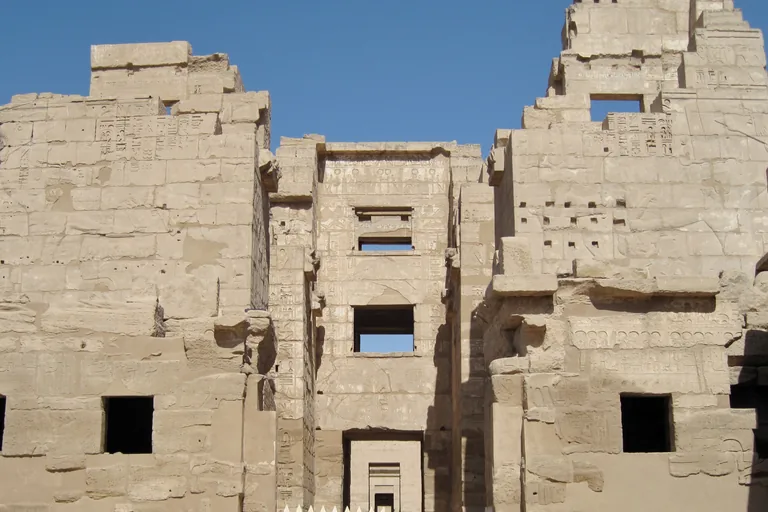
Photo: Olaf Tausch · Wikimedia Commons source · CC BY 3.0 · Cropped to the recorded 3:2 source rectangle and resized from the exact hash-bound source input. Medinet Habu High Gate
The High Gate, also called the Gate of Ramesses III, is the eastern entrance through the great mudbrick wall around his mortuary temple, a gate between two towers with terraces, and today it is the only way into Medinet Habu. The route stops here for the end of the king's reign written into the gate: two small buildings flanking the entrance probably housed gatekeepers who controlled who came in, and their decoration was barely begun when Ramesses III died, so Ramesses IV had it carved in his own name; the judicial papyrus that tells of the plot against the king came to Turin from the collection of Bernardino Drovetti. The stand point is on the approach outside the gate; going through it needs a Medinet Habu ticket, separate from the Deir el Medina one, so check locally where tickets are sold and checked.
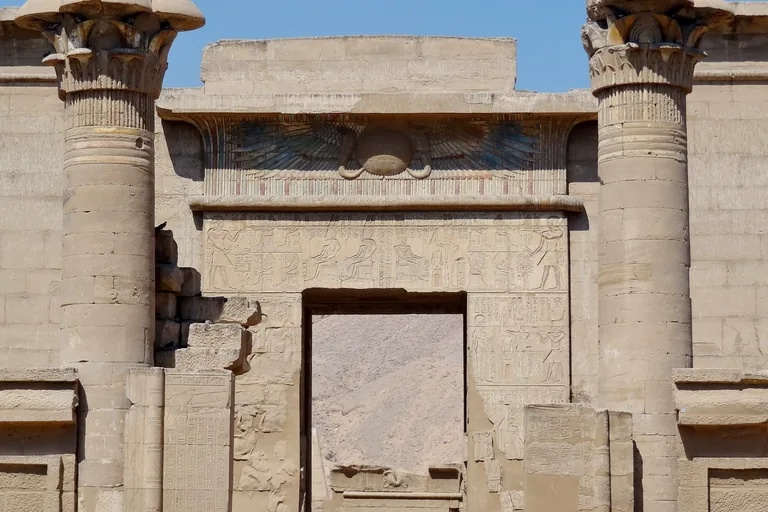
Photo: Olaf Tausch · Wikimedia Commons source · CC BY 3.0 · Cropped to the recorded 3:2 source rectangle and resized from the exact hash-bound source input. Small Temple of Amun and the God's Wives
Just inside the High Gate, the small temple of Amun of the Eighteenth Dynasty stands on the mound of Djamu in the north east corner of the compound, facing, across a broad alley, the chapels built in stone for the God's Wives of Amun. The route stops here for details that are easy to miss: the Dyad Chamber once held a colossal pair statue of Amun and Thutmose III lit by a single light well in the roof, so the five smaller rooms had no natural light of their own in the original design, the burial under the floor of Amenirdis's chapel was robbed so thoroughly that her sarcophagus has never been found, and the stone chapels later served as cellars for Coptic houses built over them. The stop is on the level paved path just inside the High Gate, inside the ticketed site; the small temple and the chapels may be closed or roped off, so the stop is told from the path.
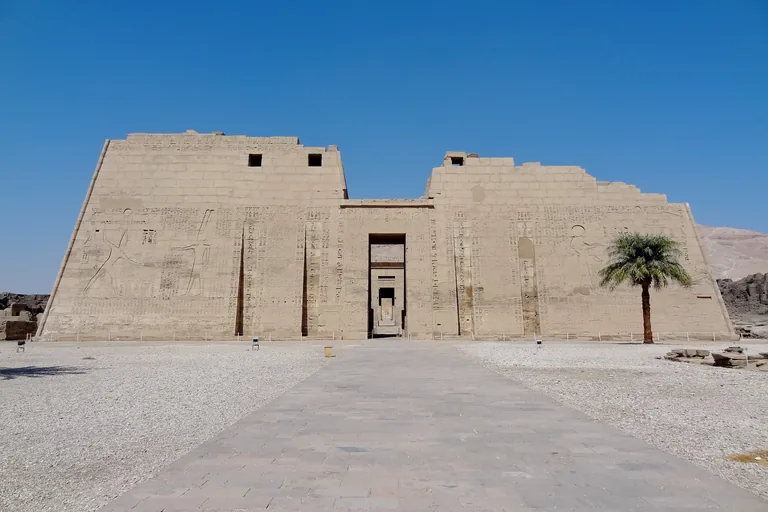
Photo: Olaf Tausch · Wikimedia Commons source · CC BY 3.0 · Cropped to the recorded 3:2 source rectangle and resized from the exact hash-bound source input. First Pylon and the Battle Wall
The great pylon at the front of Ramesses III's temple, whose shape echoes the hieroglyph for the horizon, once had its wall whitewashed and its figures brightly painted, and the outer north wall beyond it carries part of some forty war reliefs of at least five campaigns that cover the temple's outer walls, its pylon and its courts. The route stops here for the people who recorded those walls: by December 1924 Harold Nelson and the Berlin artist Alfred Bollacher had finished the west wall and three scenes on the north wall, working from tall ladders, scaffolds and bosun's chairs hung from the pylon, and the war scenes appeared in July 1930 in a huge format of 60 by 48 centimetres, in 500 copies. The stop is inside the ticketed site, on open, uneven ground beside the north wall with no made path; the north side may be roped off at times, and then the stop works from the north end of the pylon.
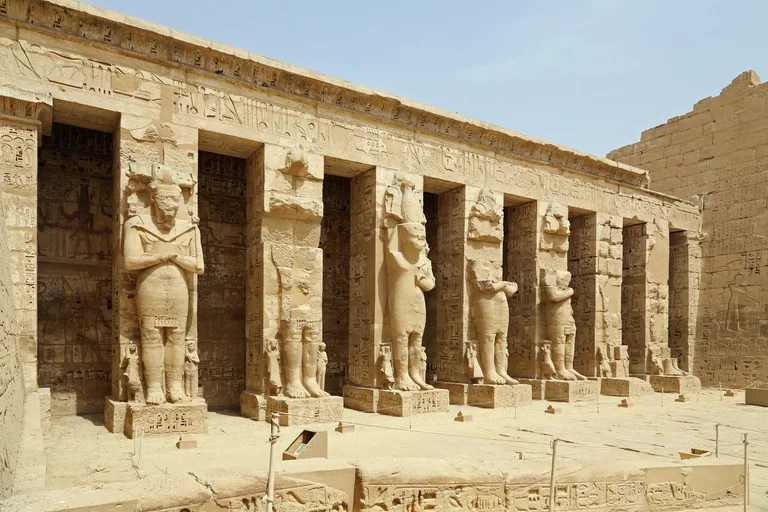
Photo: Marc Ryckaert · Wikimedia Commons source · CC BY-SA 4.0 · Cropped to the recorded 3:2 source rectangle and resized from the exact hash-bound source input. First Court and the Palace Window
The court behind the great pylon was the forecourt of both the temple and the royal palace, the palace's columned portico on the south side facing seven pillars on the north, each with a statue of the king wearing an elaborate Atef crown, with a small prince and princess at his sides. The route stops here for the scenes along its walls: on the north wall episodes of the daily temple ritual end with the reversion of offerings, by which food offered to the god was passed on until it fed the priests and staff, and on the south wall, which is also the front of the palace, the king visits the royal stables and parades in his chariot with his tame lion alongside. The court is paved and level, reached through the pylon doorway over a stone threshold, inside the ticketed site; the palace behind the south wall may be closed.
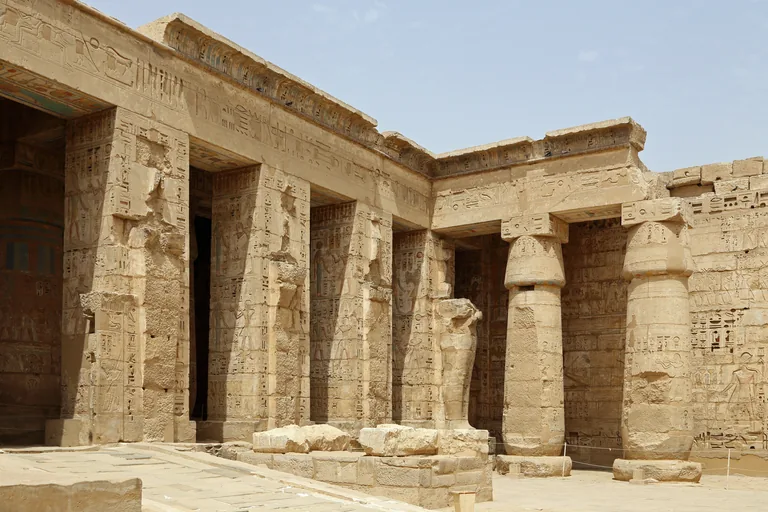
Photo: Marc Ryckaert · Wikimedia Commons source · CC BY-SA 4.0 · Cropped to the recorded 3:2 source rectangle and resized from the exact hash-bound source input. Second Court and the Town of Djeme
The second court of Ramesses III's temple is ringed by colonnades, with columns to the north and south and pillars with Osiride figures of the king to the east and west, and a door on its south side led to a well that gave the pure water for the temple services. The walk ends here for the people who outlasted the temple: the remains of a baptismal font from the church of Djeme lie in the southern half of the court, the many arrow tips found along the foot of the enclosure wall suggest the townspeople used the walls as a refuge, and Butehamun, the scribe of the royal tombs whose house stood inside the walls, used pieces of earlier coffins to assemble his own outer coffin. The court is reached up a stone ramp through the second gateway and is paved; the walk ends here inside the ticketed site, and the way out is back through the courts and the High Gate, where the village by the gate has cafés.


_-_2025-12-11_-_15.jpg)
_-_2025-12-11_-_16.jpg)


Local context
Before you go
The walk covers about two and a half kilometres, one way and downhill, from Deir el Medina to Medinet Habu. It starts at the Deir el Medina site entrance, which is reached by car or taxi, passes through two ticketed sites joined by about one and a half kilometres of public road, and ends in the second court of Ramesses III's temple at Medinet Habu, where there are cafés by the gate.
On the ground
Access and surfaces
About two and a half kilometres, one way and downhill, through two ticketed sites joined by a public road. Deir el Medina and Medinet Habu each need their own ticket; check locally where they are sold before you go up to Deir el Medina, and check opening hours locally. Deir el Medina is reached by car or taxi. Inside both sites the ground is ancient paving, packed earth, gravel and steps, uneven throughout, with steps up to the tomb chapels at Deir el Medina. Between the two sites the walk follows about one and a half kilometres of road with traffic and, for much of the way, no pavement: walk in single file, facing the oncoming traffic. There is no shade at Deir el Medina or on the road. From May to September midday heat is dangerous: walk early in the morning or late in the afternoon, and carry water. Which tombs at Deir el Medina are open changes from season to season; the walk views the tomb chapels from outside and never needs a tomb ticket. Expect offers from guides and drivers at both sites.
Frequently asked
Plan the walk
- How long is the Luxor West Bank audio walking tour?
- Allow about 100 minutes. The route covers 2.4 km (1.5 mi) in 11 stops, including walking and listening time.
- Where does the Luxor West Bank tour start and end?
- It starts at the entrance of the Deir el Medina site, which is reached by car or taxi, and ends in the second court of Ramesses III's temple at Medinet Habu, where there are cafés by the gate.
- Do I need tickets for the walk?
- Yes. Deir el Medina and Medinet Habu each need their own ticket; check locally where they are sold before you go up to Deir el Medina, and check opening hours locally. The walk views the tomb chapels from outside and never needs a tomb ticket.
- Is the route hard going?
- In places. The ground inside both sites is uneven, and between them the walk follows about one and a half kilometres of road with traffic and, for much of the way, no pavement, so walk in single file facing the oncoming traffic. There is no shade at Deir el Medina or on the road: from May to September walk early or late and carry water.
- Will the Luxor West Bank audio tour work offline?
- Yes, after download. Audio, stop text, images, and GPS triggering work without data; the live map background still needs a connection.